A Guidebook on Bobbin Winding


A bobbin is a little plastic or metal spool that holds thread and is located in the lowest portion of the machine. Each stitch is formed by catching the bobbin's bottom thread with the top thread coming through the needle. A professional stitcher must wind the thread onto a bobbin and affix it into place before he can sew with his machine. This process is called bobbin winding.
Before winding the bobbin, the machine needs to be removed and placed on the table. One has to plug it in and turn on the main switch to power it with electricity. The professionals have to keep the sewing machine's instruction manual or quick start guide beside them as they might need it anytime. Then, they can gather all the essential supplies, including a spool of thread, at least one bobbin made for the sewing machine, and a pair of scissors.
Guide on Bobbin Winding
Specific varieties of bobbin mechanisms should be provided with particular models of sewing machines. The fundamentals are roughly the same. However, the position of the operating hood might vary considerably. The professionals have to familiarise themselves with the sewing equipment if they have misplaced the instruction book that comes with images. They may also refer to online videos and tutorials. Bobbin cases are usually outfitted with an extra body or top loader.
Step 1: Discard the Useless Bobbins
The first step in bobbin winding is to take the old one out of the casing. After that, the professionals need to ensure that the needle is in the top position. The machine's speed needs to be adjusted to medium for more control. The professionals need to initiate the process with an empty bobbin as it will enable them to remove any old thread and begin with a new colour. They can purchase extra bobbins for the various colours they intend to use regularly. Buying extra bobbins for each colour saves them time and trouble while rewinding.
Step 2: Observe the Parts to Understand them

These steps can be adhered to after initiating the bobbin winding process:
The professionals must examine the machine's top for analysing the parts they will need for the winding operation. After that, they need to observe the spindle, threading guide, and winder. All of these parts should be listed in their machine's manual.
Each brand can employ a unique working system. Getting a hold of these systems before continuing the further process is essential.
Step 3: Unlock the Clutch
The clutch needs to be unlocked so that the needle does not move upward or downward. It is required only for some of the models. The clutch is located in the interior part of the handwheel and appears like a doorknob.
Step 4: Threading the Machine
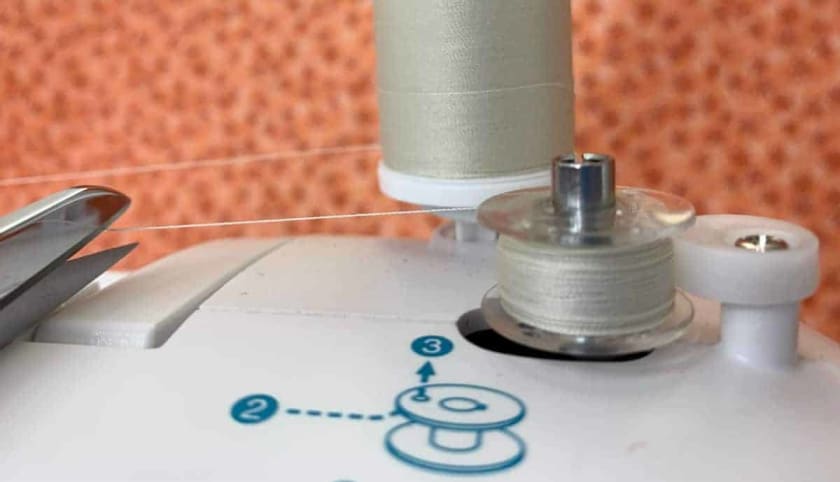
The bobbin needs to be fixed on its winder such that the holes remain at the top position. After that, the professionals need to insert the thread of their choice onto the pin. Finally, they should loop the chosen thread on the guide and get it to the tiny top hole by dragging it. Now, they will need to wind some thread across the bobbin.
Step 5: Click the Winder
Once the professionals have the bobbin on the winder, they need to click on the right part of the winder. After that, they can start winding on the machine.
Step 6: Initiate the Winding Process
The winding needs to be done slowly to ensure that it is happening in the correct direction and without causing the thread to bunch. The professionals have to trim the first starting thread as soon as possible to prevent it from entangling elsewhere. Then, they have to insert the thread in the bobbin completely. When the bobbin is complete, the machine will halt immediately on its own. However, they must ensure that they don't stretch the limit.
Step 7: Reset the process
The winder needs to be opened towards the left side. After that, the clutch needs to be reset, and the professionals must also detach the thread. Once the bobbin is perfectly wrapped, it is time to re-insert the freshly wound bobbin inside the casing and start the sewing process.
Manufacturers frequently include additional tools with their devices for bobbin winding. With an extra set of sewing supplies on hand, the professionals can save time. Also, if they don't wish to pull the spool while winding, the accompanying tools will come in handy:
Problems in Bobbin Winding

1. Failing to Hold the Thread’s End at the Beginning
The professionals must use the bobbins designed with tiny slits that allow them to grip the thread's end. If the bobbin lacks this feature, they must ensure that its end is properly held as they begin winding. Once it rotates a couple of times, they need to release and cut the thread. They should avoid using threads that come with a large tail because they can get stuck in their bobbin if they don't wrap it properly.
2. Entangled Thread On the Bobbin Winding Pin
A thread might get entangled on the pin of the bobbin winding frequently. It may occur without their knowledge, resulting in the uneven winding of the bobbin. The professionals should use a torch or flashlight to carefully examine the machine's interior, especially surrounding the bobbin winding pin. Upon finding the thread, it must be appropriately removed using sewing tweezers. The thread shouldn't be trimmed unless necessary to prevent it from slipping in the machine. The bobbins must wind better once they detach the thread.
3. Improper Wrapping of the Thread on the Tension Disc
The professionals have to retrieve the thread from the guides of threads and tension discs before initiating the process of bobbin winding for even binding. Some users might wrap the thread two times on the tension disc to encourage consistent bobbin winding. Each sewing machine comes with unique features and designs. To get exact information setting the machine for carrying out the process of winding of the bobbin, they refer to the instruction manual.
4. Failing to Guide the Thread While Winding
Modern sewing machines automatically guide the thread as the professionals wind it on the bobbin. It can be shown using a pencil. They must avoid using their fingers as they might get trapped in the gears.
5. Not Engaging the Winder Completely
If the bobbin fails to wind smoothly on pressing the foot pedal, it may not be completely engaged. It will make the winding uneven. To activate the bobbin winding mechanism, the bobbin pin must be pushed, or the bobbin wheel should be made loose enough to engage it properly.
6. Failing to Utilise the Appropriate Bobbin
Though the bobbins look identical, there are some minor differences in the bobbins of different brands. Only the bobbins that are compatible with the machine should be used. Not choosing the bobbin with the perfect size will fail to wind correctly, and the outcome will be uneven stitches.
7. Defective Bobbin
Metal bobbins that are defective are uncommon, although they do occur. The metal may contain roughness due to a lack of finishing during the production process. This may cause snagging of the thread or result in an improper winding of the bobbin. The defective bobbins should not be used. The professionals must start using a fresh one every time they find a faulty piece. Bobbins made from plastic tend to be defective at times as their shape transforms due to heat, and they are easily damage-prone compared to metal bobbins. If the plastic bobbin is not compatible with the winding pin, they should find a new plastic bobbin that fits it perfectly.
8. Worn Rubber Ring Attached to the Winder
At the bobbin winding pin, there is a ring made of rubber. It will wear out over time and hinder the winding process. If the machine has become old, the ring needs to be repaired to ensure the smooth functioning of the winder. If the professionals are not well-versed in handling it, they must seek help from a technician who excels in repairing sewing machines.
Conclusion
Bobbin winding must be done correctly. Long-term success requires reasonable amortisation; in particular, timely replacement of the thread and repair of the major parts of the sewing machine will ensure many years of efficient and smooth operation. The brands looking for expert artisans and inventory can look for B2B manufacturing platforms. Fashinza is a B2B platform that enables vendors, manufacturers, tailors, and other stakeholders in the fabric and apparel industry to find their requirements. They can visit the website today and make significant progress in their business!


